- Wild Style Magazine
- Deck Building
- 12 deck railing ideas and the code rules behind them
12 deck railing ideas and the code rules behind them
Find the right deck railing ideas for your yard and learn the local building rules that keep your family safe around open edges and stairs.
Words by Reuben Stillwagon9 min to read
Picking the right deck railing ideas balances the view from your yard with strict local building codes. You have options ranging from basic wood balusters to glass panels and metal cables. The local building department always has the final say, so check your permit requirements before you buy materials or start cutting wood.
1. The guard rules every style has to meet
The International Code Council says the International Residential Code is in use or adopted in 49 states, the District of Columbia, Guam, Puerto Rico and the U.S. Virgin Islands. Local building departments adopt and adjust this code, so they always make the final call on your permit.
Many towns base their deck inspections on the model rules. The American Wood Council's DCA 6 deck guide says all decks more than 30 inches above grade must have a guard. The DCA 6 guide says guard openings must not allow a 4-inch sphere to pass through. That single rule dictates exactly how far apart you can space your balusters and cables.
2. Traditional wood balusters
Vertical wood balusters give you a classic finish that matches almost any home exterior. You cut two horizontal wood rails and attach two-by-two lumber between them. Pine usually costs the least and takes paint well. Cedar resists rot better than many woods and looks good with a clear stain.
To build this style, you measure the distance between your heavy structural posts. You cut a top and bottom rail to fit that exact gap, then cut your vertical balusters to length. A miter saw makes quick work of this repetitive cutting.
To pass inspection, the gaps between your wood balusters must block that 4-inch sphere. Carpenters space the pieces tightly, leaving just a fraction of an inch below the limit. This leaves enough room for the wood to swell in the rain without touching the next piece. You secure each baluster with exterior wood screws driven through the top and bottom rails.
3. Powder-coated aluminum balusters
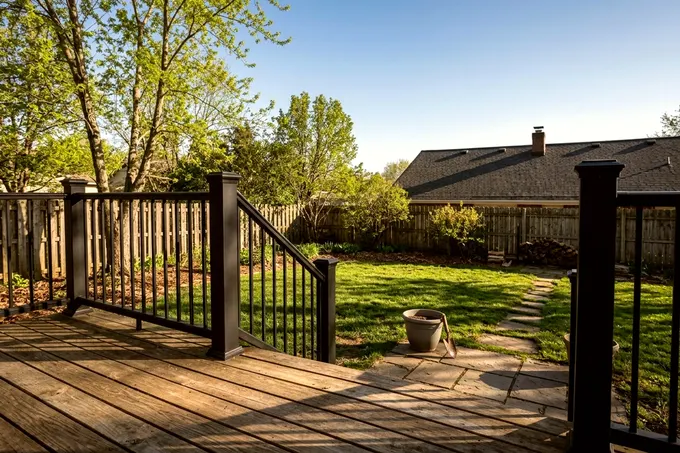
If you want the wood look with less maintenance, swap the wood spindles for powder-coated aluminum balusters. These thin metal tubes fit between wooden top and bottom rails. The metal stays straight, does not splinter and often holds its color longer than painted lumber.
You can buy aluminum balusters in round, square or flat profiles. They attach to the wood rails using hidden plastic connectors. You screw the connectors directly to the flat wood rails in a straight line. You slide the metal tubes over the bottom connectors, then press the top rail down over the whole row.
You still have to measure the gaps carefully to keep the space tight enough to block a 4-inch sphere. Cutting the aluminum to a custom height requires a hacksaw or a power saw equipped with a metal-cutting blade. File the cut ends smooth before you slide them onto the connectors.
4. Stainless steel cable rails
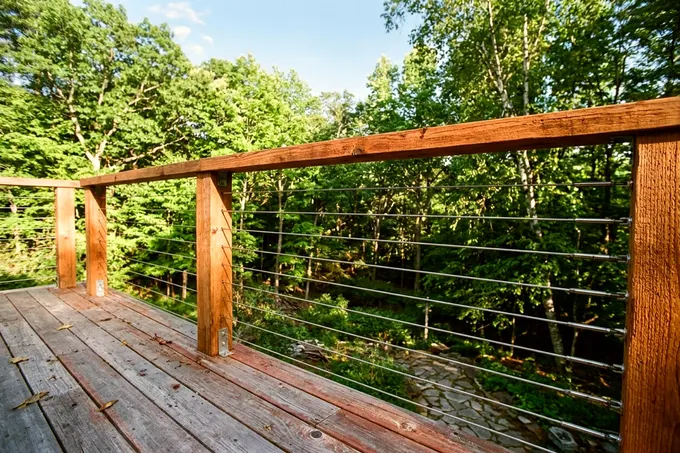
Cable railing uses thin metal wire pulled tight between thick structural posts. The horizontal lines disappear into the background, leaving you a clear view of your yard. You tension the cables with heavy threaded steel fittings hidden completely inside the end posts.
Cables can give under pressure, so a gap that starts tight may widen enough to let a 4-inch sphere pass through. Ask your building department how it checks cable spacing. Follow the cable kit maker's instructions for hole spacing and any intermediate supports, and confirm the layout with your building department.
Building a cable rail puts a lot of tension on the end posts, so follow the kit maker's post and attachment instructions and have the plan checked by your building department. You run the cables through holes drilled in the intermediate posts and tighten the ends with a wrench.
5. Welded wire mesh panels
Welded wire mesh offers the same open view as horizontal cable but without the complex tensioning hardware. You buy heavy gauge metal sheets welded into a square grid pattern. These panels slide into solid frames built between your main deck posts.
Mesh panels eliminate the worry about cables stretching over time. The rigid steel squares hold their shape perfectly, so you easily meet the requirement to block a 4-inch sphere. The metal grid does catch more falling leaves and blowing snow than horizontal cables, so you might have to brush it off after a storm.
Mesh works well if you want a rugged, industrial finish next to a wood or composite deck surface. You cut the large metal sheets to fit any run between your posts using bolt cutters or an angle grinder. You hide the sharp cut edges inside a groove cut into the surrounding wood frame.
6. Tempered glass panels
Glass deck rails block the wind while giving you an entirely unbroken view. You slide thick tempered glass sheets into metal tracks or clamp them tightly between heavy stainless steel brackets. Glass panels still have to meet your local guard rules, so ask your building department which glass and mounting systems it accepts.
Tempered safety glass is made to break into small pieces rather than large sharp shards. The glass panels weigh a lot, so your bottom rails and posts must carry that heavy load without sagging. You usually order the panels custom cut by a glass supplier to fit exactly between your installed posts.
Glass requires constant cleaning to remove dried water spots, fingerprints and bird strikes. A solid glass wall also blocks the breeze, which can make your deck feel warmer on a summer afternoon. Choose this option mainly if your deck faces a beautiful view and strong prevailing winds you want to block.
7. Horizontal wood slats
Horizontal boards offer a modern, clean look and give you more privacy than traditional vertical balusters. You attach narrow deck boards horizontally across the outside face of your structural posts. The stacked boards look like a solid fence and block the view from the street or the neighbor's yard.
Some local building departments may restrict horizontal slats, so always check with yours before buying a pile of lumber for this specific style. If they allow the horizontal design, you still have to keep the gaps between the boards narrow enough to catch a 4-inch sphere.
You build this style using standard exterior lumber like cedar or pressure-treated pine. Stagger the seams where the boards meet so they do not all land on the same post. This staggering keeps the entire railing structure rigid. You fasten the boards with long exterior screws driven directly into the structural posts.
8. Composite and vinyl rail kits
Manufacturers sell boxed railing kits made of the same plastics and wood fiber blends used for modern deck boards. The kits include post sleeves, top rails, bottom rails and matching balusters. Everything snaps or screws together using hidden fasteners that leave a clean finish.
Vinyl and composite materials generally resist rot and insects and do not need paint. The kits often cost more up front, but they can save you hours of measuring, cutting and painting. Check that the kit is rated for use as a guard and that its spacing meets your local code.
You start by sliding the hollow plastic sleeves over your structural wood posts. You cut the top and bottom rails to the right length, then attach metal brackets to the posts. Follow the kit maker's instructions for how far the rails may span between posts. You pop the balusters into the pre-cut holes and secure the rails to the brackets.
9. Planter rails along the perimeter
Adding planters to your deck railing softens the hard wooden edges with trailing flowers and green foliage. You can hang heavy plastic window boxes over a standard top rail or build wooden planter boxes directly into the guard structure.
The guard rules still apply firmly behind the plants. A dirt-filled planter box may not count as a required guard, so ask your building department, and any openings in the guard behind it must still stop a 4-inch sphere. The railing behind the planter stops people from falling if the wooden box rots or breaks away.
Keep the planters relatively lightweight so they do not stress the railing posts over time. Wet potting soil weighs a tremendous amount. Make sure you drill drainage holes in the bottom of any box so rainwater escapes quickly. Line wooden boxes with thick plastic to stop the wet dirt from rotting the wood structure.
10. Flat drink rail tops
A drink rail is a wide, flat board attached horizontally to the top of your railing. It gives guests a sturdy place to rest heavy glasses and plates during a backyard barbecue. You simply cap your standard vertical balusters with a wide deck board instead of a narrow, rounded handrail.
Use a flat board that exactly matches your deck surface for a cohesive, intentional finish. You have to support the wide board properly underneath so it does not warp or cup in the hot sun. A standard two-by-four installed flat under the drink rail provides a solid, flat nailing surface.
A drink rail functions perfectly if you plan an outdoor kitchen on a deck. Guests can stand right at the edge of the space and socialize without holding their plates the entire time. Sand the edges of the top board smooth so nobody catches a splinter while leaning against the rail.
11. Built-in bench seating
Built-in benches save valuable floor space and give you permanent seating completely around the edge of your deck. You frame the heavy wooden bench supports directly into the floor joists and add a slanted backrest for comfort. This permanent setup often acts as a physical barrier in place of a standard railing.
The rules change slightly when seating replaces a normal guard. The DCA 6 guide says guard openings, including those under benches used in place of guards, must not allow a 4-inch sphere to pass through. You have to close up the space under the seat tightly.
Height limits also shift. The DCA 6 guide says that where fixed seating is next to a guard, guard height should be measured from the seat rather than the deck surface. That means the backrest should extend high enough to protect someone sitting or standing on the bench from falling backward over the edge, and your building department sets the final height.
12. Stair railings and required handrails
Stairs need entirely different protection than the flat deck surface. The side rails running down the angle of your stairs stop people from falling off the open edge, but stairs with enough risers also need a separate, graspable handrail.
The DCA 6 guide says stairs with four or more risers need a handrail on at least one side, set 34 to 38 inches above the tread nosing. A flat two-by-four is usually too wide to grip, so it may not count as a handrail. Choose a profile that meets the graspable handrail rules in your local code.
You can light these stairs and rails for evening use, and local code may also require a light at the top landing. Low-voltage lights built into the stair risers or wired directly under the post caps keep the edges visible. Run the wires as the light kit's instructions say, and hire a licensed electrician for any wiring tied into the house.
How to narrow down your choices
Your final choice comes down to the yard view you want to keep and the maintenance schedule you want to accept. Glass and cable keep the yard completely visible, but glass needs regular cleaning and cable needs careful tensioning. Wood often costs less on day one but usually needs fresh stain or paint now and then.
Vinyl and aluminum often need less upkeep than wood. Check the maker's cleaning instructions. If you host parties often, the flat drink rail modification gives you the most function for very little extra work.
Get permit approval from your local building department before you order materials, since it saves you from ripping down a finished project.


