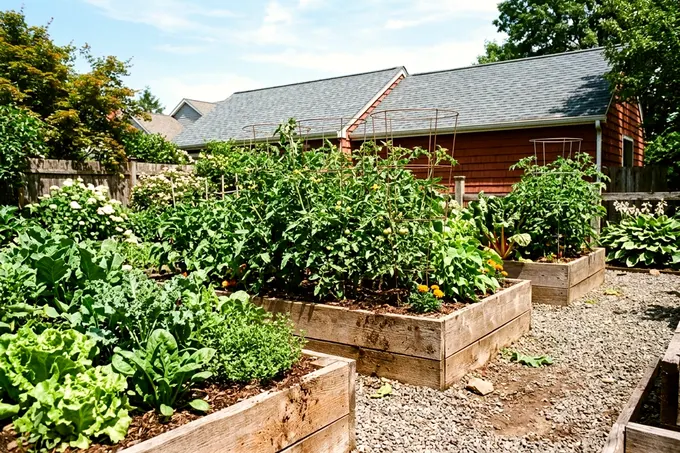
- Wild Style Magazine
- Garden Design
- How to build raised garden beds that last for years
How to build raised garden beds that last for years
Learn how to build raised garden beds for your yard with practical advice on framing materials, soil and picking a layout for your fresh vegetables.
Words by Sybil Rademaker7 min to read
Build a raised garden bed by assembling a sturdy frame on a level spot and adding quality soil. A good frame holds the dirt above the surrounding ground to improve drainage and make pulling weeds easier. A weekend of work sets up a growing space that lasts for years.
Pick a sunny and level spot near a hose
Vegetables need abundant sun to grow well. Watch your yard for a full day to find spots that get sunlight from morning through late afternoon.
You want a flat piece of ground to keep the frame stable. A flat spot also stops water from pooling at one end. Walk the area to check for low dips or steep slopes. Avoid planting at the very bottom of a hill where cold air and water settle.
Place your garden where a hose easily reaches it. Carrying heavy watering cans across the yard gets old fast. A short trip from the faucet makes daily watering an easy habit. If you plan a garden layout close to the house, you will probably check the plants more often.
Keep the beds away from large trees. Tree roots creep into the loose soil and steal water from your plants. Give yourself enough room to push a wheelbarrow between the boxes. A wide path leaves plenty of space for hauling dirt and harvesting crops.
Size the bed for an easy reach
The best size for a raised bed depends on how far you can comfortably reach. You need to pull weeds and pick vegetables from the middle without stepping on the soil. Stepping inside packs the dirt down and hurts plant roots.
Make the bed wide enough so you can walk around both sides and reach the center. A bed built against a fence or wall should be narrow enough to reach all the way across. You never want to overreach and strain your back to grab a ripe tomato.
Length matters less than width. A long box is standard because many boards come pre-cut to standard lengths. Using full boards saves you from making extra cuts with a saw. Add a cross brace in the middle of longer frames to stop the sides from bowing out.
Height depends on your budget and your back. A shallow bed works fine for lettuce and herbs. Root crops like carrots and potatoes need deeper dirt. Higher beds are easier on your knees but cost much more to fill.
Pick a frame material that fits your budget
Wood is the most common choice for a garden frame. Cedar often resists rot and insects. It costs more upfront but usually holds up well outdoors. Pine and fir are cheaper options for a first project.
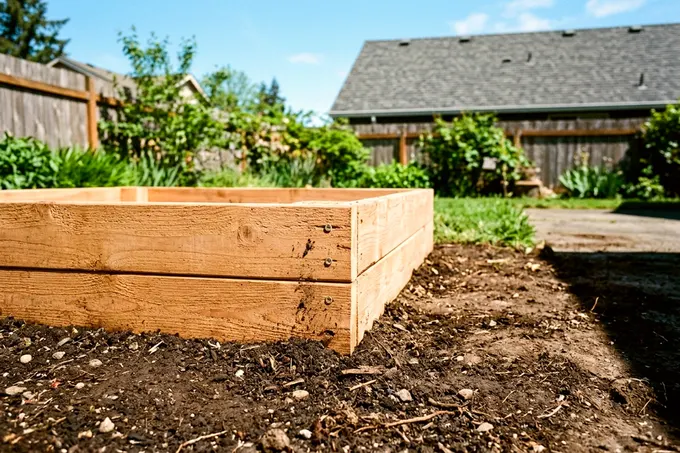
A pine frame may not last as long as cedar, and the lower boards tend to rot first. You can replace the bottom boards when they soften. Many gardeners start with cheap pine to test a location before buying expensive cedar.
Galvanized steel offers an industrial look and lasts a long time. Metal sides may warm the soil faster in the spring. Warm soil helps seeds sprout early in cooler climates. You can buy corrugated roofing panels and screw them to wood corner posts for a custom look.
Stone and brick make heavy walls that will not rot or rust. Stacking concrete blocks is cheap and fast. You can plant small flowers in the block holes to soften the gray concrete. Choose stone if you want a permanent fixture in the yard.
What to know before reusing old treated lumber
Old lumber from torn-down fences or decks requires a safety check before you build a garden box with it. You have to check when that wood was made. In December 2003, makers of chromated arsenical (CCA) wood preservatives voluntarily stopped producing treated wood for homeowner uses.
Before 2004, CCA treated wood was used in residential structures such as decks and playsets. The EPA advises that wood treated with chromated arsenicals should not be reused in products such as mulch. Do not chop old treated lumber into mulch, and if you cannot tell what it was treated with, leave it out of the garden.
You need a safe way to dispose of the old scraps. The EPA advises against burning CCA or other preservative treated wood in a residential setting. EPA says homeowners can usually dispose of treated wood with ordinary trash collection, but state and local rules may differ. Call your city solid waste department to ask about drop-off rules.
If you want rot resistance, the EPA lists wood treated with other EPA approved preservatives and composite or wood alternative materials as alternatives to CCA wood. Check the label and the maker's instructions on any new treated lumber before using it around vegetables.
Build the frame square and level
Clear the grass and weeds from your chosen spot. Use a shovel to slice under the turf and remove it in sheets. Digging the grass out prevents weeds from growing up through your new bed.
Rake the bare dirt flat and tamp it down with your boots. Cut your lumber to length and lay the pieces out on a flat driveway. Drill pilot holes in the ends of the longer boards to stop the wood from splitting.
Gather these tools and materials before you start assembling:
- Exterior wood screws to hold the joints tight
- A cordless drill to drive screws and bore pilot holes
- A circular saw to cut the boards to length
- A carpenter square to check the corners
- A level to keep the top edge flat
Fasten the corners together with exterior wood screws. Long screws hold thick framing lumber tight. Use a square to check each corner. The frame must sit square so the boards do not twist apart over time.
Carry the finished box to your cleared spot and set it down. Place a level on top of the side boards. Dig a little dirt out from under any high spots until the bubble centers. A level frame stops water from rushing to the lowest corner.
To keep grass from creeping in later, edge your garden beds with a shallow trench or heavy stones. A clean border makes running a lawnmower around the boxes much easier.
Fill the bed with a draining soil mix
Raised beds need a dirt mix that stays loose and drains well. Do not shovel dirt straight from your yard into the frame. Yard soil often packs down tight and can starve plant roots of air. A loose blend of topsoil and compost holds moisture while letting excess water drain away.
Buying bags of garden soil from a hardware store works well for one small box. It gets expensive fast if you have a deep frame to fill. For a large garden, call a local garden center and order bulk topsoil and compost. Delivery saves you from hauling dozens of heavy plastic bags in your car.
Lay a sheet of plain brown cardboard over the bare ground inside the frame. The cardboard smothers any remaining grass roots and rots away by the time your plants grow deep. Wet the cardboard with a hose so it lays flat against the dirt.
Shovel your soil mix into the box. Break up any large clumps with a heavy rake. Fill the frame to just below the top edge. The dirt will settle after the first few rains, and leaving a lip stops water from spilling over the sides.
Plant, mulch and water the first season
Wait a few days for the fresh soil to settle before you start planting. Check the seed packets or plant tags for spacing rules. Giving plants room to breathe prevents disease and fungus. Air must flow freely between the leaves to keep them dry.
Group your crops by height. Put tall plants on the north side of the box so they do not block the sun from smaller plants. Knowing what your garden zone means helps you pick perennials that survive your winters.
Spread a layer of mulch around the stems once your plants are in the ground. Straw, pine needles or shredded leaves all work well. A thick layer of mulch stops weed seeds from sprouting on the bare dirt. It blocks the sun from baking moisture out of the soil.
Water the bed thoroughly after planting. Give the dirt a slow soak until water starts seeping out the bottom of the frame. Check the soil with your finger every morning. If the dirt feels dry below the surface, grab the hose.
Refresh the soil and frame each spring
The soil level drops as organic matter breaks down and feeds the plants. Weeds blow in over the winter and sprout in the early spring.
Pull any weeds as soon as the ground thaws. Add a fresh layer of compost over the top of the old dirt. You do not need to dig the compost deep into the bed. Rake it smooth and let the rain pull the nutrients down to the root zone.
Top off the box with a little extra topsoil if the level sank over the winter. Plants need enough depth to establish strong root systems. A full box gives your vegetables the best chance to survive hot summer days.
Check the wood frame for damage before you plant. Winter weather causes boards to swell and shrink, which loosens corner screws. Tighten the hardware and replace rotting boards while the bed sits empty.


